
 Infernal / quiver
Boosting
OSRS Dizana's Quiver Guide: Colosseum Waves & Death Budget
Learn how to earn Dizana's quiver in OSRS: wave modifiers worth taking, a realistic death budget, Sol Heredit mechanics, gear floors, and when a practiced boost is the honest call.
Game screenshots and facts are cited from the Old School RuneScape Wiki (strategy, equipment, drops, and related pages). Writing is original editorial, not a copy of the wiki article.

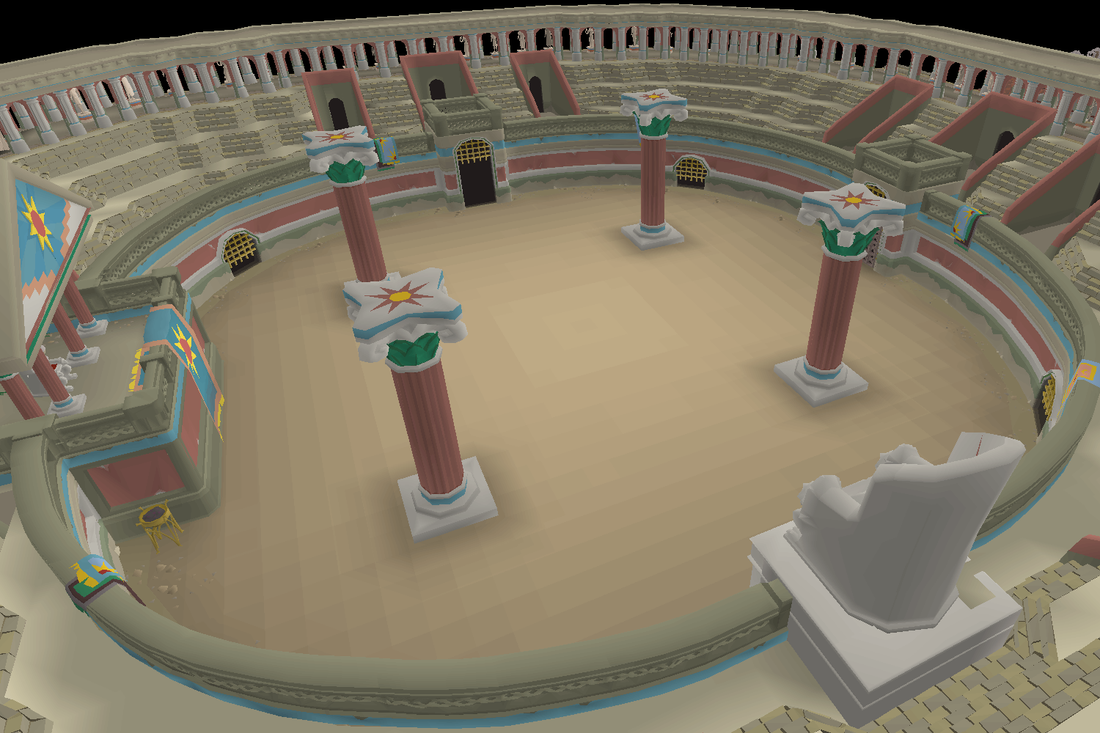
Dizana's quiver is the best-in-slot ranged cape in Old School RuneScape, and it lives behind the Fortis Colosseum: a twelve-wave gauntlet that blends Fight Caves-style endurance with Sol Heredit's mechanical execution. Unlike a bank-standing goal, the quiver demands that you survive wave modifiers, learn boss patterns, and understand exactly what a death costs you. This guide covers which modifiers are worth banking Glory on, which ones quietly end runs, the gear floors that make the grind honest, and how to budget your deaths without lying to yourself.

Whether you're a first-timer with 80s combats or an experienced raider chasing pet rolls, the Colosseum rewards preparation more than raw gear. We'll break down the systems, then talk about when a practiced boost makes more sense than burning another 500k on a Solarflare II mistake.

Requirements and Access to the Colosseum
- Completion of Children of the Sun (Varlamore access)
- High Combat stats — 80+ in Attack/Strength/Defence/Ranged/Magic recommended for early waves; 90+ and 94 Magic for consistent wave 12 clears
- 43+ Prayer required; 77+ recommended for protection and Rigour/Augury
- Ranged 75+ to equip Dizana's quiver, but higher is expected for the Colosseum itself
- Melee or ranged DPS gear, plus a spec weapon and blood spells or a blowpipe for sustain
Access is simple once you've unlocked Varlamore. A ring of dueling teleport, a quetzal whistle, or a short run east from Civitas illa Fortis will put you at the entrance. The arena itself has a lobby with a bank and a grave for your items after death — use it to regear quickly between attempts.
How the Fortis Colosseum Works
Each run is a sequence of up to twelve waves. Before each wave you'll see a modifier selection and a preview of the next wave's loot. Completing a wave banks Glory based on damage taken, time spent, errors, and which modifiers you accepted. Only your personal best Glory matters for rewards. If you die, teleport out mid-wave, or log out, all accumulated loot is lost and you're sent to the lobby grave.

- Waves 1–11: escalating enemy groups with additional spawns during the wave, not just at the start.
- Wave 12: Sol Heredit only; the arena shrinks to the inner area between pillars.
- Ending a run early: a rewards chest appears and you can claim current loot; unique chance increases past wave 4.
- Death: unsafe; unprotected items go to a grave in the lobby, but all accumulated loot is gone.


Wave Modifiers Worth Taking
Modifiers are the core risk-reward dial. Some are nearly free Glory; others are run-enders unless your execution is already tight. The right pick depends on your gear and current wave, but the principle is simple: take modifiers that add predictable damage you can prayer against or out-DPS, avoid ones that force constant movement or add overlapping spawns.
| Modifier style | Example names | Risk level | When to take |
|---|---|---|---|
| Single-buff enemy stats | Red Flag, Dynamic Duo | Low to moderate | Early waves with high DPS; adds Glory without extra mechanics |
| Extra spawn pressure | Quartet, Bees II | High | Only if you can AoE burst or freeze spawns; never with Solarflare overlap |
| Hazard/one-shot mechanics | Solarflare II, Doom II | Very high | Late in a deathless run when you need the final Glory push; otherwise avoid |
| Prayer or supply drain | Not named in research; verify current list | Variable | Take only if you bring extra restores and have overhead room |
The Waves That End Runs
Some waves are known account-check points because they introduce a new enemy mechanic that punishes a specific mistake. From the combat achievement task list, wave 4 includes a Manticore whose avoidable damage is a common HP sink, wave 7 includes a Minotaur that can heal other enemies, wave 11 demands survival with one of three demanding modifiers, and wave 12 is purely Sol Heredit. A realistic death budget includes extra attempts at these checkpoints.
- Wave 4 — Manticore: Stand still too long and its avoidable attack chunks you. Focus on moving between attacks and not greeding DPS.
- Wave 7 — Minotaur healer: If the Minotaur heals another enemy, the fight drags and supplies bleed out. Kill or freeze the Minotaur first.
- Wave 11 — modifier gate: The 'One-off' achievement requires Red Flag, Dynamic Duo, or Doom II active. Some players take Doom II for the Glory, then discover why it's called Doom.
- Wave 12 — Sol Heredit: No adds, but every mistake is 30+ damage and a possible instant restart if you're low on supplies.
Sol Heredit: Mechanics and Mistakes
Sol is a mechanics boss, not a DPS dummy. Prayer does not reduce his AoE damage, so the fight is about reading his telegraphs and moving before the dust settles. He always opens with Spear 1, then follows a pattern: if he uses the same attack style twice, the second uses a different pattern; mixing styles resets the pattern. He remembers his previous attack across phase transitions, but a special resets him.
- Spear 1: step back from his centre or edge tile.
- Spear 2: move to any off-centre tile.
- Shield 1: a 7x7 hazard under him with a one-tile gap; step one tile back.
- Shield 2: a 9x9 middle; step two tiles back.
- Phase transitions at 90%, 75%, 50%, 25%, 10%: six beams of light spawn molten sand around you; a crystal rotates the arena edges and fires beams. Move early, then return to the normal rhythm.


Gear Floors and Inventory Planning
The Colosseum is not a single-style raid; you need switches for burst damage, sustain, and boss mechanics. The wiki's wave 1 money-making guide lists 80+ stats, 43+ Prayer, 77+ recommended, with 80+ Ranged for Venator bow and 86+ Magic for barrage. The wave 12 completion guide bumps that to 95+ melee/range, 90+ Defence, 94 Magic, and 77+ Prayer. Those are not hard requirements, but they reflect the gear floor where deaths become less common.
- Budget floor (learn waves 1–7): Barrows or black d'hide, blowpipe or rune crossbow, trident or ancient staff for burst, defence potions, and protect item on your best piece. Expect deaths; keep reclamation fees low.
- Consistent floor (wave 12 attempts): Masori or crystal armour, Venator bow for AoE, toxic blowpipe for healing, blood barrage, and a dragon warhammer or BGS for defence reduction if meleeing.
- BIS floor (speedrun or pet farm): Tumeken's shadow, full Masori, Twisted bow, Scythe of vitur, and full Sunfire fanatic armour. You're not here for the first quiver.
Relevant gear comparison when deciding between Void and blessed d'hide: Void vs Masori & Blessed D'hide: When Void Is Still the Right Ranged Set in 2026.
Death Budget: What a Realistic Learning Curve Costs
Dying in the Colosseum is not like a raid where you pay a fixed 500k and keep going. Every death sends you to the lobby, strips your accumulated loot, and asks for a reclamation fee. Until you've completed 100 total waves, that fee is reduced by 75% (capped at a 125k discount). After that, the full fee applies, so the game literally gives you a grace period to learn.
- Early learning (waves 1–8): expect 10–20 deaths. With budget gear and protect item, each death might cost 50k–200k in fees plus supplies. Total: 1–4M.
- Sol Heredit attempts: another 10–20 wipes. If you're in mid gear and have passed the 100-wave grace period, a single death can cost 300k–500k. Total: 3–8M.
- Loot opportunity cost: every death before claiming throws away the wave loot you would have banked. A wave 8 chest often holds several hundred thousand coins in sunfire splinters and supplies; that loss adds up faster than fees.
When a Practiced Boost Is the Honest Call
There is a difference between not being able to learn and not having the time to learn. If you've died 40 times to Solarflare II and still can't read Sol's spear pattern, a boost is not an admission of failure — it's a time-value decision. A practiced team or solo pilot who has completed the Colosseum dozens of times can finish a quiver run in under 30 minutes, whereas a learner might spend 20 hours and 10M in deaths. If your goal is the cape for your account's ranged setups, not the personal achievement, outsourcing the final push can be the rational call.
Before you pay, make sure you've done the honest part: learn waves 1–7 yourself, bank some Glory, and understand what modifiers do. Then if Sol is the only wall, a boost that only handles wave 12 is often cheaper than a full run. Ask your provider to stream or share the run history, and never give out your recovery details. Get a service quote if you want a current price range for account boosting in the Colosseum.
Dizana's Quiver: Why It's Worth the Grind

The quiver requires 75 Ranged to equip and immediately outclasses Ava's assembler for ranged offence even uncharged. It gives +18 ranged attack and +3 prayer, plus a second ammunition slot that accepts arrows or bolts. That means you can carry dragon arrows and ruby bolts at the same time without banking, or pair ammo with a blessing.

- Charging: add up to 20,000 sunfire splinters for Dizana's Sunfire, giving +10 ranged accuracy and +1 ranged strength to arrows and bolts. Charges are consumed on a random 1/3 roll, so they last a long time.
- Extra slot versatility: equip two ammo types, or keep a blessing in your normal slot. The quiver's slot doesn't allow javelins or atlatl darts.
- Exchange value: extra quivers can be traded to Minimus for 4,000 sunfire splinters or a 1/200 chance at Smol Heredit. That floors the quiver's value at the splinter price, so duplicates are never dead content.
Common Mistakes and Final Tips
- Greeding loot: The interface tempts you to continue for the next wave's unique. If your supplies are low or a nasty modifier is offered, cash out. The quiver is guaranteed on beating Sol, not on wave 11's chest.
- Ignoring Glory thresholds: Personal best Glory unlocks better reward tiers, but it doesn't accumulate. One clean run is better than five sloppy ones; focus on 28-minute speedrun tasks only after you have the cape.
- Forgetting the death grace period: Until 100 waves completed, your reclamation fee is heavily discounted. Use those attempts on Sol, not on wave 3 with budget gear.
- Bringing a fire cape instead of learning the Colosseum: The quiver is BIS for ranged; once you have it, Ava's assembler becomes a bank placeholder. If you're already Inferno-capable, the Colosseum is a different skillset, not a free cape.
- Skipping early Glory tasks: Combat achievements like Denied, Furball, and One-off give you practice on the exact mechanics that kill runs. Do them while you're learning; they're not distractions.
After your first quiver, the Colosseum remains a top-tier money maker: the wiki's wave 1 guide lists over 1.4M/hour with 80+ stats, and wave 12 completion exceeds 13M/hour with max gear. The real reward is the cape slot, but the splinters and uniques pay for the deaths along the way.
Sources
Frequently asked questions
What are the requirements to start the Fortis Colosseum?
Complete Children of the Sun to access Varlamore. There are no strict combat level requirements, but you'll want 80+ in your chosen style, 43+ Prayer, and 75 Ranged to equip the eventual quiver. Higher stats and 94 Magic for Ice Barrage make wave 12 consistent.
How do wave modifiers work in the Fortis Colosseum?
Before each wave, you're offered several modifiers that increase difficulty and Glory. Some add enemy stats or extra spawns; others introduce hazards. Selecting tougher modifiers boosts your personal best Glory but also raises death risk. The exact effect of each modifier is shown in-game and on the wiki.
Is Dizana's quiver better than Ava's assembler?
Yes, even uncharged. Dizana's quiver gives +18 ranged attack and +3 prayer, outclassing Ava's assembler for offence. It also adds a second ammunition slot for arrows or bolts. Charged with sunfire splinters, it adds +10 ranged accuracy and +1 ranged strength to relevant ammo.
How much does a death cost in the Colosseum?
Deaths are unsafe, and you lose all accumulated loot. Your items go to a grave in the lobby, and you pay a reclamation fee. Until you've completed 100 total waves, the fee is reduced by 75% up to 125k. After that, standard death costs apply. Budget several million for a full learning curve.
What waves should I expect to die on while learning?
Wave 4 introduces a Manticore whose avoidable damage punishes passive play. Wave 7 has a Minotaur that heals other enemies; killing it first is key. Wave 11 forces a demanding modifier such as Red Flag, Dynamic Duo, or Doom II. Many players also wipe repeatedly on wave 12's Sol Heredit.
Can I keep loot if I teleport out mid-wave?
No. Teleporting or logging out during a wave causes all accumulated loot to be lost, just like dying. To keep rewards, you must end the run before the next wave begins or defeat Sol Heredit. The rewards chest then appears in the arena centre.
What is the best way to learn Sol Heredit?
Watch video guides for spear and shield telegraphs, then practice with cheap gear. Sol's attacks are dodgeable and prayer does not reduce them. Focus on moving correctly before adding DPS. Expect 10–20 dedicated pulls; each phase transition adds beams of light that require immediate movement.
Marketplace
Get live rates, instant quotes, and hand-traded delivery on Trillionaire Services.
Related listings
 Infernal / quiver
OSRS Boosting: How It Works & What to Expect
From infernal capes to raid carries — how professional boosting works, timelines, safety plugin handoff, and how to get an accurate quote.
 High-end PvM
OSRS Yama Oathplate Guide: Contracts, Death Fees & Boosting
High-end PvM guide to Yama and Oathplate: contract variants, death costs, solo vs duo learning, and the honest case for boosting over grinding.
 High-end PvM
OSRS Awakened DT2 Bosses: Which to Learn First & Why Kits Are So Expensive
A high-end PvM guide to the awakened Desert Treasure II bosses—learning order, death costs, expensive ring and axe kits, and when to buy a boost instead of sinking hours into practice.