
 New updates
News
OSRS Hueycoatl Guide: Loot, Difficulty, Group vs Solo
A deep dive into the Hueycoatl boss in Varlamore: recommended stats, damage thresholds, unique drops, and whether solo or group kills are worth it.
Game screenshots and facts are cited from the Old School RuneScape Wiki (strategy, equipment, drops, and related pages). Writing is original editorial, not a copy of the wiki article.

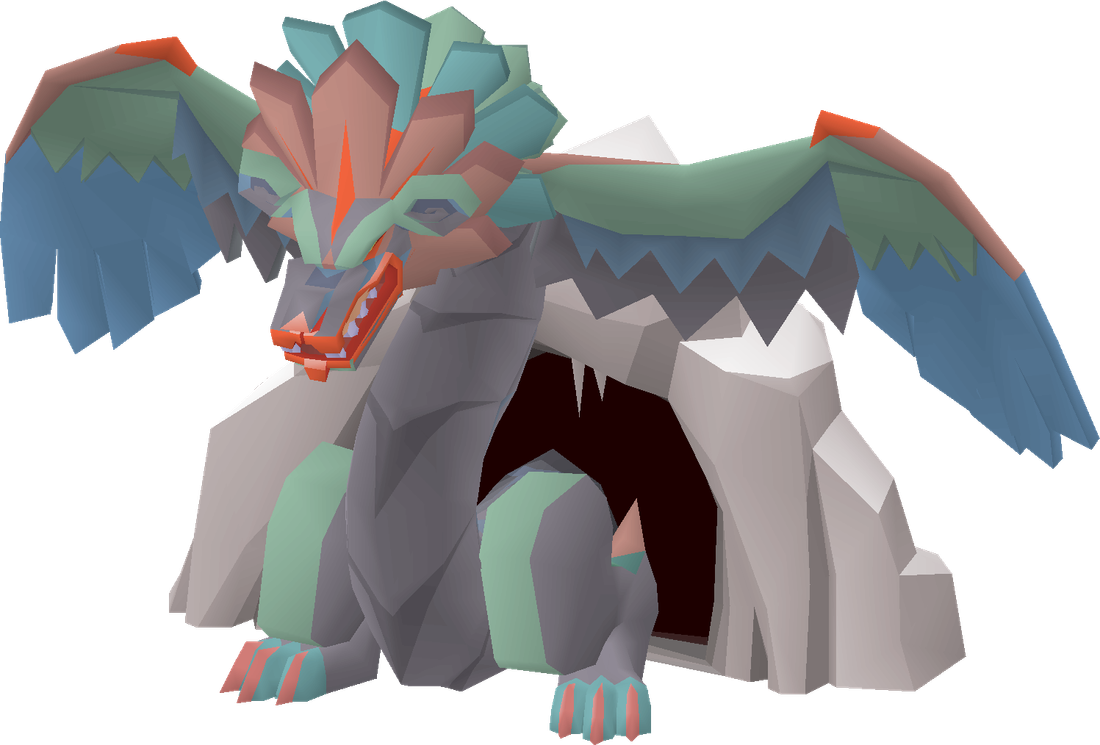
The Hueycoatl is one of Old School RuneScape's newer draconic bosses, tucked inside the Hailstorm Mountains of Varlamore. It is designed as a mid-to-high-level PvM encounter that scales from a solo challenge up to a 20-player mass, and it rewards a mix of stable supplies and rare uniques. Because the loot system uses contribution thresholds rather than fixed shares, understanding the mechanics is just as important as having the right gear.

This update explainer is aimed at players deciding whether Hueycoatl is worth adding to their routine. We'll cover recommended stats, how to reach the arena, the fight's body/head/tail structure, what the unique drops actually do, and how group kills compare with paying for a private solo instance.

Who the Hueycoatl Is For and What You Need
The Hueycoatl sits in the gap between entry-level Varlamore tasks and more punishing high-end bosses. It is accessible to mid-level mains and ironmen who have completed the early Varlamore questline, but it rewards players who push their melee stats, prayer, and gear into the 80s and 90s. The boss itself is a draconic creature coiled around the Darkfrost, and the dwarves of Cam Torum need help subduing her after she awakened and wreaked havoc around the mountain.
Recommended baseline
- 85+ Combat and 43+ Prayer — lower levels get a warning but can still enter.
- 80+ melee stats for solo money-making; 90+ recommended.
- 70 Prayer for Piety, or 76+ for Thralls if using Arceuus spells.
- High magic defence or ranged armour to deal with off-prayer projectiles.
You can fight the Hueycoatl in a group of up to 20 players, and ironmen are eligible for drops in a group. Solo is possible, but some parts of the fight are easier when responsibilities are split. If you are below the recommended combat and prayer, the game will warn you before entering but will still let you proceed if you accept the dialogue.
Reaching the Darkfrost and Instance Options
The Hueycoatl lair is at The Darkfrost, a frozen area in the Hailstorm Mountains of Varlamore. Unlocking Varlamore requires completion of Children of the Sun, after which Regulus Cento can take you to Civitas illa Fortis via quetzal. From there, the region's transport network — quetzals, waystones, and teleport items like the Pendant of Ates — makes reaching the boss area straightforward.
Once at the arena, you have two main ways to fight:
- Public encounter: Join the official Varlamore PvM worlds and walk in with up to 20 players. This is the lowest-effort way to learn.
- Private instance: Use the meeting flag next to the bank buffalo to start a private fight. The fee is 50,000 coins, reduced to 25,000 after completing hard Combat Achievements.
Private instances are popular for solo or small-team consistency, as you avoid competing with randoms for contribution and can control the kill pace completely.


Fight Overview — Body, Head, and Tail Mechanics
The arena fight is split across different parts of the Hueycoatl. Players initially confront exposed body segments at the base of the mountain, then the fight moves through head and tail phases. The boss uses avoidable mechanics: a lightning attack, a tail slam, and projectile attacks that can be protected against with prayer. Avoiding these is essential for perfect-kill Combat Achievements and for extending your trip length.
Damage Thresholds for Loot
- 5 or fewer players: You must deal 25 damage to the body and 75 damage between the head and tail.
- 6 or more players: You qualify with either 25 damage to the body or 75 total damage across the whole fight.
- Neutral/recoil damage only: You need around 120 total damage to qualify.
- If you fail to deal at least 25 damage to the body, your rewards are reduced by 95%.
- Stand too far away — the three eastern-most columns — and you will not receive a drop.
The threshold system means you cannot simply tag the boss once and afk. You need to actively participate during the body phase at minimum, and in small teams you must contribute across both the head and tail. This makes the fight feel fair without requiring top DPS, but punishes leeching hard.


Loot System and Unique Drops
The Hueycoatl drops a large lump of items on death, and each player's share is based on their total damage. Multiple players can independently roll uniques from a single kill, so even in a mass there is a reason to push your contribution. The unique table has a 1/18 chance per player to roll, scaled by contribution, and uniques are dropped in addition to the main loot.
The standout rewards are:
- Dragon hunter wand — 1/105 from the unique table.
- Tome of Earth (empty) — 1/90.
- Hueycoatl hide — 3 hides at 11/315.
On the regular table you can expect noted rune weapons and armour, runes, ammunition, seeds, and other supplies. The MVP receives Big bones. The wiki's solo money-making guide lists an hourly profit of approximately 1,616,020 coins, but that assumes efficient solo kills with major uniques priced in.
Contribution matters: The more damage you deal, the larger your share of the main drop and the better your personal unique chance. Group members who only hit the bare minimum will see much lower average value per kill.
| Unique | Rarity | Wiki GE Price at Research |
|---|---|---|
| Dragon hunter wand | 1/105 | ~9,289,562 coins |
| Tome of Earth (empty) | 1/90 | ~584,083 coins |
| Hueycoatl hide (3) | 11/315 | ~1,135,677 coins |
Hueycoatl Hide Armour and Where It Fits
The Hueycoatl hide is used to make ranged armour, including the Hueycoatl hide chaps. These chaps require 70 Ranged and offer a defensive upgrade over blessed dragonhide, with higher prayer bonus and magic defence. The legs alone provide +17 ranged attack, +31 stab/slash/crush defence, +30 magic defence, and +2 prayer bonus.
The chaps appear in wiki-recommended gear lists for a surprising range of content: Slayer training, K'ril Tsutsaroth, Fight Caves, Kalphite Queen, Zulrah, Kraken, Abyssal Sire, Vorkath, Alchemical Hydra, Inferno first cape, and many mid-level tasks. That makes Hueycoatl hide a solid account progression item, not just a niche Varlamore trophy.
Tip: If you plan to do the 'I'm your son' Combat Achievement, you'll need two pieces of Hueycoatl armour. Keeping a hide drop to craft the body and legs can save you from buying them later.
Combat Achievements and Speed Goals
There are 11 Combat Achievement tasks worth 41 points in total. They range from simple kill-count tasks to restrictions and grandmaster speed-runs, so even casual players can pick up a few points while learners can work toward the harder ones.
| Task | Tier | Points | Description |
|---|---|---|---|
| Hueycoatl Champion | Medium | 2 | Kill once |
| You're a wizard | Medium | 2 | Kill using only earth spells |
| Pillar Lover | Hard | 3 | Kill while it is vulnerable |
| Perfect Hueycoatl | Elite | 4 | Perfect kill 5 times with no avoidable damage |
| Hueycoatl Speed-Chaser | Master | 5 | Kill in 2:30 with 5 or fewer players |
| Hueycoatl Speed-Runner | Grandmaster | 6 | Kill in 2:30 with 3 or fewer players |
The speed tasks push group coordination and personal DPS; many players first complete the elite speed trial solo or with a small group, then attempt the grandmaster time with a tight team. Restriction tasks like 'You're a wizard' and 'Is it a bird?' ask you to limit your weapon type, which changes how you approach the kill entirely.
Group vs Solo — Time, Attention, and Profit Tradeoffs
The biggest decision is whether to join public masses, form a small team, or pay for a private solo. Each has different attention demands and profit expectations. The table below summarises the main tradeoffs.
| Method | Players | Attention | Typical Kill Pace | Unique Chance | Notes |
|---|---|---|---|---|---|
| Solo private | 1 | High — you manage every mechanic | Slower kills, but all loot is yours | Full personal roll | 50k fee (25k with hard CAs); wiki lists ~1.6m/hr |
| Small team | 2-5 | Medium — split responsibilities | Faster than solo, but you must meet 75 damage head/tail | Roll chance scaled by contribution; multiple uniques possible | Good balance; ironmen can get drops |
| Public mass | 6-20 | Low — mostly DPS and avoid one-shots | Very fast kills, but contribution per player drops | Reduced personal unique chance unless you out-damage the crowd | Great for learning or low-effort kills; many players only hit threshold |
Warning: Do not join a public mass and only auto-retaliate with recoil damage. If you fail the 25 body damage threshold, your loot is reduced by 95%, and the pet chance is cut by the same amount.
For most players, starting in a public mass to learn the fight is smart, but once you understand the phases, moving to a small team or solo dramatically improves your average loot per hour. The private instance fee is a small cost compared to losing out on unique rolls because of low contribution in a mass.
Common Mistakes and How to Avoid Them
- Missing the body damage threshold. Always deal at least 25 damage to the exposed body before the phase ends. In small teams, also track your head/tail damage to reach 75 total.
- Standing in the wrong spot. The three eastern-most columns do not count as in range for loot; move closer before the kill ends.
- Relying on recoil. Pure recoil/defensive damage requires around 120 damage, which is much harder than just attacking. Use a real weapon.
- Eating avoidable damage. The lightning, tail slam, and off-prayer projectiles all count against perfect kills and reduce trip length. Learn the attack tells and switch prayers early.
- Underestimating group contribution scaling. In large teams, only the top contributors will see consistent unique rolls; being lazy costs you most of the value.
- Paying full instance fee without hard CAs. If you solo often, complete hard Combat Achievements first to cut the fee from 50k to 25k.
- Ignoring Hueycoatl hide value. The chaps are a genuine ranged upgrade, so selling hides immediately may not be the best use if you still need ranged gear for Slayer or bossing.
Practical Next Steps and Marketplace Angle
If you are returning to OSRS or want to skip the early Varlamore grind, a few focused steps will get you Hueycoatl-ready. Complete Children of the Sun, train melee stats to 80+, unlock Piety, and try a few public kills to learn the damage phases. Once comfortable, move to a 2-3 player team or private solo for better profit.
Buying supplies or a starter account through a marketplace can speed up the preparation, but always verify prices and service legitimacy on the wiki or official channels before spending. If you do use outside help, choose a support team that understands OSRS account security and does not encourage rule-breaking. Shop with support if you want to compare options.
Related reads: OSRS Varlamore Mid-Game Loop: Colosseum, Quests, Profit Guide and OSRS New Boss Release Checklist: Week One Guide are both useful if you are planning a Varlamore PvM block.
Sources and Verification
The facts in this guide come from the live OSRS Wiki. Because prices, drop rates, and meta can shift with updates, always double-check the pages below before committing large amounts of gold.
Frequently asked questions
What are the requirements to fight Hueycoatl in OSRS?
The entry warning appears below 85 Combat and 43 Prayer, but you can still enter. For efficient solo kills, aim for 80+ melee stats, 90+ recommended; 70 Prayer for Piety and 76+ for Thralls. High ranged or magic defence helps with projectiles.
Can you solo Hueycoatl in OSRS?
Yes. The boss can be fought solo, though some mechanics are easier in a group. Solo players must handle all body, head, and tail damage themselves and still meet the same contribution thresholds. The wiki lists a solo money-making method around 1.6M per hour, but it requires high stats and attention.
How does Hueycoatl loot contribution work?
For 5 or fewer players: deal 25 damage to body and 75 between head and tail. For 6+: either 25 to body or 75 total. Failing the body threshold reduces rewards by 95%. Multiple players can roll uniques independently.
What are the unique drops from Hueycoatl?
Dragon hunter wand (1/105), Tome of Earth empty (1/90), and 3x Hueycoatl hide (11/315). The unique table has a 1/18 chance per player, scaled by contribution. Uniques are rolled in addition to the normal loot.
Is Hueycoatl good money in OSRS?
The solo money-making guide lists about 1.6 million coins per hour. Profit depends heavily on unique luck and your contribution. Group masses kill faster but give smaller shares, while solo or small teams retain more value per kill.
What does Hueycoatl hide make in OSRS?
Hueycoatl hide is used to craft ranged armour, including the Hueycoatl hide chaps. The chaps require 70 Ranged and offer stronger magic defence and prayer than blessed d'hide. They are recommended for many Slayer and bossing setups.
How do I unlock Varlamore for Hueycoatl?
You need to complete the Children of the Sun quest to access Varlamore. Then travel to The Darkfrost, likely via quetzal or waystones. The boss itself has no separate quest requirement, but you should talk to Regulus Cento after the quest to reach the kingdom.
Marketplace
Get live rates, instant quotes, and hand-traded delivery on Trillionaire Services.
Related listings
 New updates
OSRS New Boss Release Checklist: Week One Guide
Learn how to dissect a new boss blog in Old School RuneScape: check requirements, gear needs, unique drops, and whether week-one learning fits your account and bank value.
 New updates
OSRS Raging Echoes League Rewards: What Matters on a Main
Most Raging Echoes League rewards are cosmetic, but some still matter on a main account. We break down tradeable kits, untradeable trophies, GP per point, and whether to earn points or buy with gold.
 New updates
OSRS Project Rebalance Combat Update: Mains, Pures, and Boosting
How OSRS Project Rebalance's combat changes reshaped elemental weaknesses, ranged defence types, and Combat Achievements — and what that means for mains, pures, and boosting.