
 High-end PvM
Boosting
OSRS Inferno First Cape: Wave Run-Enders, Gear Floors & Boost Honesty
Break down the Inferno waves that end first-cape runs, the minimum gear you can realistically clear with, death costs, and when a practiced boost is the honest option.
Game screenshots and facts are cited from the Old School RuneScape Wiki (strategy, equipment, drops, and related pages). Writing is original editorial, not a copy of the wiki article.

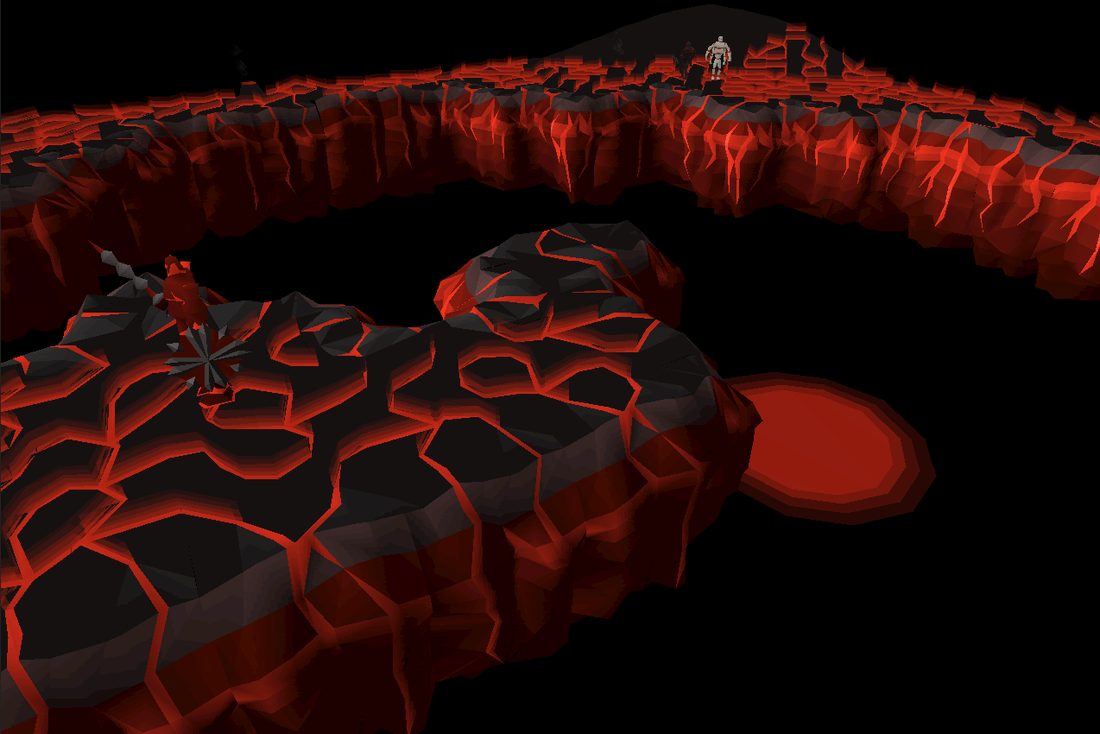
The Inferno is Old School RuneScape's ultimate solo endurance test: 69 waves of increasingly lethal TzHaar creatures, capped by TzKal-Zuk, the level 1400 final boss. The reward is the infernal cape, the strongest melee cape in the game and a badge of elite PvM capability. For many players, the first cape is a months-long project; for others, it's a wall that ends hundreds of attempts. This guide breaks down the wave milestones that end runs, the minimum gear you can realistically clear with, and the honest case for practicing versus hiring a boost.

We'll pull from multiple community strategy pages to give you a decision-focused walkthrough, not a rehash of the wiki.

The First-Cape Requirements
Before stepping into the Inferno, you must hand over a fire cape to TzHaar-Ket-Keh. That's a one-time payment, after which you can attempt as many times as you want. The cave is solo-only, there is no banking between waves, and purple sweets are disabled. Death does not cost items; you restart at wave 1. If you have defeated TzKal-Zuk before, you can be assigned TzHaar as a Slayer task, which boosts damage inside and increases pet chance. But that's for repeat runs.
- 90+ Ranged and 90+ Magic (94+ Magic for Ice Barrage)
- 80+ Defence and 90+ Hitpoints
- 77+ Prayer for Rigour and Augury (strongly recommended)
- Completed the Fight Caves multiple times for Jad familiarity
- A bank that can fund dozens of supply loads: Saradomin brews, super restores, bastion potions, stamina potions, runes, and ranged ammunition
The Inferno is not a place to learn basic prayer switching; it expects you to already handle Jad's attack patterns under pressure. Community guides consistently emphasize that gear is secondary to execution. A twisted bow is the single biggest gear upgrade, but many first capes have been earned with a Bow of Faerdhinen and crystal armour. Expect to fail many times—each death is data.
Wave Milestones That End Runs
There are 69 waves, and monsters are introduced in a predictable ladder. Nibblers (Jal-Nib) appear every wave up to 66, and they chew through the three pillars—each with 255 hitpoints. If you lose pillars early, you lose safespots that are essential for solving later waves. Waves 1–17 introduce bats and blobs and meleers. Waves 18–34 add rangers. Waves 35–49 add magers. Waves 50–66 combine everything in increasingly nasty double and triple spawns. Wave 67 is a single Jad; wave 68 is triple Jads; wave 69 is Zuk with an extra Jad spawn. Any remaining pillars are automatically destroyed at the start of wave 67.
| Wave range | New threat | What usually ends the run |
|---|---|---|
| 1–17 | Meleers, blobs, bats | Pillar neglect; taking melee hits while barraging nibblers |
| 18–34 | Rangers | Safespotting errors; rangers draining supplies if not protected |
| 35–49 | Magers | Mage+range combos; incorrect prayer priority |
| 50–66 | Doubles and triples of all styles | Supply exhaustion; pillar collapse forces tanking |
| 67 | Single Jad | Panic switching; healers overwhelm |
| 68 | Triple Jads | Mistiming the staggered attacks |
| 69 | Zuk + Jad | Missing shield rotation or healers; Jad snipe during Zuk |
Pillar management is the hidden mechanic that separates first-cape winners from repeat failures. Nibblers always target intact pillars; if you can one-shot them with Ice Barrage, you preserve your safe walls. In later waves, sometimes it's correct to let a pillar fall rather than risk death trying to save it. Waves 3, 8, 17, and 34 are six-nibbler waves that signal the next monster type appears next wave—treat them as breathers to reset.
Solving Waves: The Pillar Dance
The Inferno arena is a square with three pillars. The core of every successful run is using those pillars to safespot monsters, because tanking multiple styles is a guaranteed death. At the start of each wave, quickly identify the nibbler spawns and freeze them with Ice Barrage. Once nibblers are neutralized, position yourself so that melee monsters are trapped behind a pillar while you pray against the ranged or magic attackers. Then you can kill the threats one by one, alternating prayers as needed.
Blood Barrage is your primary sustain tool when a wave is under control; it heals based on damage dealt and can save dozens of Saradomin brew sips over a run. Use it on low-Magic monsters like blobs and bats when safe. Do not attempt Blood Barrage mid-crisis—it hits slowly and you will take more damage than you heal. When you cannot protect from everything, choose the prayer against the monster that hits hardest or most accurately; magers and rangers are usually the priority, while meleers can be safespotted.
What You Can Realistically Clear With
You don't need a max bank to get an infernal cape, but you do need a coherent setup. The strategy page's gear ladder shows that expensive armour gives only modest benefits over budget alternatives; the twisted bow is the biggest DPS jump, while the Bow of Faerdhinen is the most cost-effective second choice. Crystal armour outperforms Armadyl or dragonhide because of its higher ranged defence and prayer bonus. Mage gear is only for freezing nibblers and blood barraging heals, so a simple Ahrim's or bloodbark switch is enough.
| Gear tier | Ranged weapon | Armour | Mage switch | Verdict |
|---|---|---|---|---|
| Budget | Toxic blowpipe + rune crossbow or crystal bow | Blessed d'hide, crystal shield | Ancient staff, Ahrim's top/bottom, occult | Possible but brutally slow at Zuk; high supply drain |
| Mid | Bow of Faerdhinen | Crystal armour set | Bloodbark or Ahrim's, ancient sceptre | Recommended first-cape setup; excellent balance |
| High | Twisted bow + blowpipe | Masori or crystal, Justiciar faceguard | Kodai wand, Virtus top/bottom, occult, torm | Faster clears, but skill still decides success |
Rigour and Augury are strongly recommended; without them, your DPS and defence prayers are noticeably weaker. Bring a rune pouch with soul, blood, and death runes for Ice Barrage and Blood Barrage. A divine rune pouch with water runes allows an eldritch nightmare staff special for prayer restoration, but that's optional. Two Bastion potions, 2–3 prayer regeneration potions, and a stamina potion are standard; the rest is brews and restores, adjusted to how much you flick.
JalTok-Jad and the Triple-Jad Wall
Wave 67 is a single JalTok-Jad, the Inferno's cousin of the Fight Caves Jad. It attacks with all three styles, and its attacks can one-shot you if you're not boosted. It summons five Yt-HurKot healers at half health. Wave 68 throws three Jads at you; the first attacks immediately, the other two have a slight delay so you can flick all three together. Each wave-68 Jad attacks slightly slower (9 ticks instead of 8) and summons three healers at half HP. Wave 69 spawns an additional Jad when TzKal-Zuk drops to 480 hitpoints or less, and it will initially target the Ancestral Glyph before you tag it.

The trick to triple Jads is identifying the first one to attack and positioning so all three are visible. With 9-tick attacks, you have a tiny but real window to switch prayers. Many first-cape players die here not from mechanics but from tunnel vision—they focus on killing one Jad and miss the next switch. Practice on a Jad simulator or use the Fight Caves to drill your muscle memory until switching feels automatic.
Run-Ending Mistakes to Fix Before You Queue
- Losing pillars early. If you let nibblers eat pillars in waves 1–30, you'll have no safespots for wave 50+ double magers/rangers. Kill nibblers quickly, but don't risk your life for them after wave 50.
- Tanking instead of safespotting. You cannot out-eat the Inferno. Every wave has a solution using pillars to separate monsters; if you're face-tanking two styles, you've already made a mistake.
- Wasting brews on avoidable damage. Brews are for emergencies, not for absorbing your prayer mistakes. Each brew sip drains your ranged and magic, lowering DPS, which extends the run and costs more supplies.
- Not bringing enough restores. Prayer flicking reduces drain, but if you're not comfortable flicking, bring more super restores. Running out of prayer at wave 60 is a guaranteed death.
- Panic switching at Jad. If you can't identify Jad's attack animation within half a second, you need more Fight Caves practice. The Inferno Jads hit harder and healers come faster.
- Ignoring the wave 69 Jad during Zuk. That extra Jad can snipe you while you're focused on shield rotations and healers. Tag it immediately and keep prot prayers ready.
Most first-cape runs die between waves 50 and 67—not because players are bad, but because they arrive with low supplies, missing pillars, and mental fatigue. Tighten the early game and you'll consistently see the late game.
Death Is Free, Time Is Not
Dying in the Inferno is safe for your items—you keep everything and respawn at the entrance, restarting from wave 1. Hardcore Ironmen do not lose status; Hardcore Group Ironmen lose a life. The elite Karamja Diary resurrection does not apply here. You receive Tokkul based on the wave you died on, and if on a Slayer task, the task is cancelled. There is no death fee. The real cost is time and supplies.
A serious attempt takes between one and three hours depending on your speed and how much you flick. Supplies per run include dozens of Saradomin brews, super restores, bastion potions, stamina potions, runes, darts or arrows, and prayer regeneration potions. Prices fluctuate, so check the Grand Exchange before stocking up. The opportunity cost of dozens of failed attempts adds up fast. That's why many players set a budget: a certain number of hours or supply loads before considering a boost.
| Learning approach | Attention required | Typical time to first cape | Cost |
|---|---|---|---|
| Self-learn with guides | Very high, every run | 20–80+ hours of attempts | Supply costs only |
| Coached/practiced with a friend watching | High, but feedback speeds learning | 15–50 hours | Supply costs + time |
| Hire a reputable booster | None (you provide account, they run) | Done in a day or two | Service fee + account risk |
The table above is illustrative, not a guarantee; every player's learning curve differs. The key is to be honest about your mechanical ceiling and schedule.
When a Practiced Boost Is the Honest Option
Learning the Inferno is a legitimate achievement, but it's not for everyone. If you're a player with limited playtime, shaky prayer switching under pressure, or you simply want the cape for its melee strength bonus without the 60-hour grind, a boost is a rational choice. GP Trillionaire offers Inferno completion services where experienced runners complete the waves on your account. This is not against the game rules as long as you trust the service and understand the account security tradeoffs; Jagex does not officially endorse account sharing, so do your own due diligence.
Before you decide, check out our Project Rebalance combat update breakdown to see how gear changes might affect your account, and get a service quote if you're leaning toward a boost.
The Cape, the Pet, and Your Next Step
Defeating TzKal-Zuk rewards the infernal cape, the best-in-slot melee cape. It has +4 attack across the board, +8 strength, +12 all defences, +2 prayer, and is used in virtually every melee setup where a cape slot matters. The cape can be combined with a max cape for a cosmetic variant. You also receive Tokkul (up to 16,440, doubled with elite Karamja Diary) and a 1/100 chance at the Jal-Nib-Rek pet, increased to 1/75 on a Slayer task. You can also trade unwanted infernal capes to TzHaar-Ket-Keh for another pet roll.

After your first cape, the Inferno opens up Slayer tasks for more efficient pet farming, speedrun practice, and the 12 Combat Achievements, including Grandmaster tasks like "Budget Setup" (no twisted bow) and "No Luck Required" (no damage from Zuk or Jads). Even if you never return, the cape is a permanent power spike for all melee content.
For a full wave-by-wave spawn list, gear alternatives, and advanced flicking techniques, consult the strategy page. The wiki is updated by the community as metas shift.
Sources
Frequently asked questions
What stats do I need for the OSRS Inferno?
Aim for 90+ Ranged, 90+ Magic (94 for Ice Barrage), 80+ Defence, and 90+ Hitpoints. Rigour and Augury are strongly recommended. High combat stats alone won't carry you, but starting below these numbers makes the waves unnecessarily punishing.
How long does it take to get an Infernal cape?
First-cape attempts average 20–80+ hours of practice for self-learners, depending on prior PvM experience. Each full run takes 1–3 hours, and you'll restart from wave 1 after every death. Boosting services can complete it in a day or two.
What is the best budget gear for a first Inferno cape?
A Bow of Faerdhinen with crystal armour is the most cost-effective reliable setup. A twisted bow is more powerful but not required. Use Ahrim's or Bloodbark for mage switches, and bring Rigour/Augury if possible. Budget blowpipe/crossbow setups are possible but very slow.
How do I deal with the triple Jad wave in the Inferno?
Wave 68 spawns three Jads with slightly staggered attack timings. Position yourself to see all three, identify the first attacker, and flick protection prayers rapidly. Each Jad has 9-tick attacks, giving a small window to switch. Practice on a Jad simulator until the rhythm feels automatic.
What happens if I die in the Inferno?
Death is safe: you keep all items and respawn at the entrance, restarting from wave 1. No item retrieval service cost applies. Hardcore Ironmen do not lose status, but Hardcore Group Ironmen lose a life. Your Slayer task is cancelled if you die on a TzKal-Zuk task.
Is it worth buying an Infernal cape boost?
For players with limited time or who struggle with Jad mechanics, a reputable boost can be a rational choice. However, account sharing carries security risks and Jagex does not officially endorse it. If you can consistently reach wave 60+, keep practicing—you're close.
Can I use purple sweets in the Inferno?
No, purple sweets are disabled inside the Inferno. You must rely on Saradomin brews, Blood Barrage, and prayer flicking for sustain. Plan your healing accordingly, as you cannot restock between waves.
Marketplace
Get live rates, instant quotes, and hand-traded delivery on Trillionaire Services.
Related listings
 High-end PvM
OSRS Yama Oathplate Guide: Contracts, Death Fees & Boosting
High-end PvM guide to Yama and Oathplate: contract variants, death costs, solo vs duo learning, and the honest case for boosting over grinding.
 High-end PvM
OSRS Awakened DT2 Bosses: Which to Learn First & Why Kits Are So Expensive
A high-end PvM guide to the awakened Desert Treasure II bosses—learning order, death costs, expensive ring and axe kits, and when to buy a boost instead of sinking hours into practice.
 High-end PvM
OSRS ToA Expert Invocations: Entry Raid vs 400+ and What Buyers Should Ask For
Learn how to build a 400+ ToA expert invocation list, compare entry vs 400+ difficulty, death costs and gear, and what a boosting service buyer should ask before paying.