
 High-end PvM
Boosting
OSRS Dizana's Quiver Guide: Fortis Colosseum Wave Plan, Death Cost, and Listing Premium
Master the Fortis Colosseum, reduce death costs, and claim Dizana's quiver. Learn wave planning, Sol Heredit dodges, and why the quiver carries a listing premium.
Game screenshots and facts are cited from the Old School RuneScape Wiki (strategy, equipment, drops, and related pages). Writing is original editorial, not a copy of the wiki article.

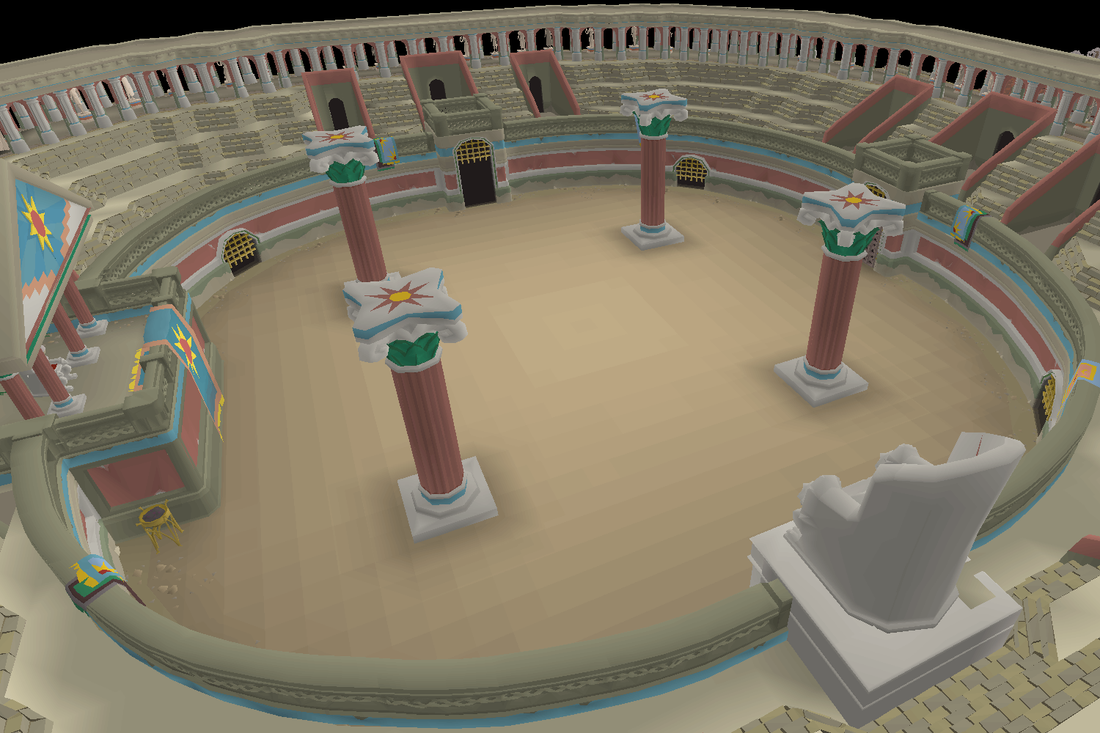
The Fortis Colosseum sits on the cliffs east of Civitas illa Fortis, and for many high-level players it is the only remaining solo PvM grind that feels like a true exam. Unlike the Inferno, which tests wave endurance over two hours, the Colosseum compresses twelve waves of escalating pressure into a shorter, more modifier-driven run. The prize at the end is Dizana's quiver: best-in-slot ranged cape, an extra ammo slot, and one of the most liquid account upgrades in the game. This guide covers wave planning, death costs, Sol Heredit mechanics, and why the quiver remains a listing premium on any OSRS account or service marketplace.

Before you step in, understand what you are risking. The Colosseum is a dangerous death area. A wipe does not just cost a gravestone fee; it deletes every piece of accumulated loot from the current run. That pressure changes how you select modifiers, when you cash out, and what gear you bring. Players who treat this like a safe boss will donate millions in lost chests.

Requirements and Who This Is For
The Colosseum is not for fresh accounts. Even a single wave clear is profitable at high combat, but the quiver requires a full 12-wave clear, including Sol Heredit. You need to complete the quest Children of the Sun to access Varlamore and the arena. From there, you can teleport with a ring of dueling or a Quetzal whistle. The in-game recommended stats for efficient wave 12 money making are in the 90s, with 77+ Prayer for overheads and Rigour/Augury. For ranged builds, 95+ Ranged is common. Melee and magic both have places, but the final fight punishes slow reactions more than raw DPS.
- Children of the Sun quest complete
- Level 75 Ranged to equip Dizana's quiver
- High combat stats — 90+ in your chosen style, 77+ Prayer recommended
- Access to a ring of dueling or Quetzal transport
- Acceptance that deaths are dangerous and loot is lost
This content is aimed at players who have already cleared Inferno or have similar high-level PvM experience. If you are still learning prayer flicking, the Colosseum will feel brutal. The good news is that wave 1 clears are sometimes used for profit, so practice is not entirely wasted.
The Colosseum Wave Plan: Enemies, Modifiers, and Pacing
Each run is a sequence of up to twelve waves. Enemies spawn in like the Fight Caves or Inferno, but extra monsters reinforce mid-wave. Before each wave you see a loot preview: current wave rewards and the next wave's potential rewards. You choose to continue or cash out. Unique rewards start at wave 4 and become more common deeper in. The Tonalztics of Ralos only appears from wave 7 onward. Dizana's quiver is guaranteed from defeating Sol Heredit on wave 12.
Modifiers are the Colosseum's signature risk lever. You pick modifiers each wave to increase Glory, the personal-best score system. Glory does not accumulate; only your best run matters. Modifiers like Red Flag, Dynamic Duo, Doom, Bees, Quartet, and Solarflare change enemy behavior and add hazards. Choosing too many early can end a run before you see the chest. A good wave plan treats modifiers as a curve: minimal modifiers on waves 1-3 while you bank supplies and learn pace, one or two on 4-6, and acceptable risk on 7-11 only if your clear time is on track. The key is to always keep the exit option open; if the next wave's loot preview does not justify the modifier you need to select, cash out.
| Wave range | Key focus | Unique reward note |
|---|---|---|
| 1-3 | Learn spawns, conserve supplies, bank early loot | No uniques |
| 4-6 | First unique chance, practice modifier combos | Sunfire fanatic pieces, echo crystal chance |
| 7-11 | High pressure, Tonalztics of Ralos possible | Rare drops scale up |
| 12 | Sol Heredit, one mistake can end run | Dizana's quiver guaranteed |
Do not sleep on wave 4. It is the point where your chest can start containing uniques, but also where modifiers begin to matter. Many players die on waves 5-7 because they selected a modifier they had never practiced.
Death Mechanics and the Real Cost of Wipes
Dying in the Fortis Colosseum is not like dying at a safe boss. You are sent to the lobby, not your respawn point. Your grave appears in the lobby, and unprotected items go there. Items left on the ground are lost. More importantly, all accumulated loot from the current run is deleted. Teleporting out or logging out during a wave also destroys that loot. This means the true death cost is often the value of the chest you were about to claim, not just the gravestone fee.
The gravestone reclamation fee is reduced by 75%, capped at 125,000 coins, until you have completed 100 waves total, including failed runs. After that, standard death costs apply. This early discount helps learners, but it does not protect your run's loot. Many players underrate this: they finish wave 7 with a chest worth several million, select a hard modifier on wave 8, and lose everything to a missed dodge. The correct play is often to cash out at wave 7 or 8 instead of greeding for a unique that has not appeared.
Sol Heredit Fight: Spear, Shield, and Phase Transitions

Sol Heredit is the second strongest monster in OSRS with a combat level of 1,563. The fight is less about DPS checks and more about memorization and positioning. Most of his attacks deal typeless damage up to 44, ignoring prayer. He creates dust hazards under himself, which you avoid by stepping to specific tiles. His basic pattern alternates between Spear and Shield attacks. If he uses the same style twice in a row, the second attack uses a different pattern than the first. If he switches styles or uses a special attack like grapple or combo, the pattern resets. After each phase transition, he always starts with a Spear attack.
Specific attacks to learn:
- Spear 1 — He begins the fight with this. Move away from his centre or edge tiles.
- Spear 2 — Used after a Spear 1 if no reset. Move to an off-centre tile.
- Shield 1 — Creates a 7x7 hazard with a 1-tile safe gap. Step back one tile.
- Shield 2 — Larger 9x9 centre hazard. Step back two tiles.
At 90%, 75%, 50%, 25%, and 10% HP he transitions phases. Six beams of light appear around you and spawn molten sand after two ticks. Crystals rotate along the arena edge, periodically firing harmless beams, but they require awareness. The fight punishes panic. Tile markers and an audio-visual cue for each attack help more than a max cape.
Dizana's Quiver: Stats, Ammo Slot, and Sunfire Charging

Dizana's quiver requires level 75 Ranged to equip. In its uncharged state it already outclasses Ava's assembler in ranged offence. It provides the best-in-slot ranged attack bonus for the cape slot and adds a second ammunition slot that can hold arrows or bolts. This extra slot lets you carry two ammo types, or keep a blessing in your main ammo slot while the quiver feeds your weapon. The ammo in your actual ammo slot is prioritised when both are compatible.


You can charge the quiver with up to 20,000 sunfire splinters. While charged, arrows and bolts fired from either ammunition slot gain Dizana's Sunfire: +1 Ranged Strength and +10 Ranged accuracy. That boost does not apply to darts, chinchompas, or the bow of Faerdhinen, because they cannot be stored in the quiver's ammo pouch. The venator bow is an exception: it does not consume quiver charges, but it still benefits from the accuracy and strength bonus if it fires arrows or bolts from the quiver. Charges are consumed on a random 1/3 roll per shot, so a full charge lasts a very long time.
The quiver also has a floor value. You can exchange an extra quiver with Minimus in the lobby for either 4,000 sunfire splinters or a 1/200 gamble at the Smol Heredit pet if you do not already own it. That exchange floor keeps the quiver's value stable and makes duplicates worthwhile.
Why the Quiver Carries a Listing Premium
On any account marketplace or service site, a Dizana's quiver unlock moves an account up a tier. The reason is not just the cape stats. It is a visible, permanent unlock that proves the account has completed one of the hardest solo challenges in the game. Buyers know the time investment: dozens of attempts, countless death fees, and the mental load of Sol Heredit. The quiver also has daily utility: the extra ammo slot is used in nearly every ranged setup, from Slayer to raids. And because the quiver can be exchanged for 4,000 sunfire splinters, even a duplicate is not dead weight.
For players who flip or resell accounts, the quiver is a checklist item that increases both perceived and real value. It pairs well with other Varlamore unlocks, which we cover in our Varlamore mid-game loop guide. For a main account, it is one of the few cape-slot upgrades that affects both PvM and PvP ranges, making it a broad premium.
However, a quiver does not make an account automatically good. Buyers still check combat stats, quest points, and other untradeables. The quiver is a strong signal, but it must be backed by the account's overall progression.
Learning vs Boosting: Honest Cost and Time Tradeoffs
There are two legitimate paths to a quiver: learn the content yourself, or pay for a service that completes it for you. Self-learning has no external cost beyond supplies and death fees, but it demands time. A player new to endgame PvM might spend 10-30 hours on attempts. Experienced raiders often get the first quiver in under 10 hours. The main cost is frustration and lost loot from greeding waves.
A boosting service removes the grind. You pay a provider, and they complete the Colosseum on your account if you trust them with access, or they coach you through the run in a duo stream. The risk is account security and potential rule issues. Jagex's stance on account sharing is strict; always verify a provider's reputation and do not share details you are not comfortable with. Some players choose a middle path: buy a service quote, but ask for coaching or a recorded attempt to learn from it.
For players who value their time over gold, a boost is an honest option. But if you enjoy the challenge, the Colosseum teaches skills that transfer to every other high-level encounter. Our Inferno first cape guide shows similar learning curves; compare the two before you decide.
Common Mistakes and How to Fix Them
The Colosseum punishes small errors. These are the most common ways players lose runs or waste time:
- Not checking the loot preview — Always know what you stand to lose if you die. If the next wave's unique chance is low, cashing out is correct.
- Over-selecting modifiers for Glory — Glory is personal best, not currency. A dead run earns zero Glory. Pick modifiers you can handle.
- Ignoring shield gaps — Sol Heredit's Shield attacks are the number one killer. Mark the safe tiles and practice the one-tile and two-tile steps.
- Panic at phase transitions — The beams of light and crystals are predictable. Pause, position, then resume DPS.
- Bringing too much risk — If you are learning, use budget gear. The death fee discount only lasts until 100 waves, but lost loot is gone forever.
- Teleporting out mid-wave to save loot — Teleporting also deletes loot. Only end the run between waves via the chest or Minimus.
Fix these by doing short practice runs: clear waves 1-3, bank, then repeat. Record your Sol Heredit fights and review where you missed dodges. Many players find that turning off entity hider for Sol and using highlighted tiles reduces reaction time.
Practical Next Step: Gear Rungs, KC Goals, and a Service Quote
If you are starting from zero, here is a progression plan:
- Warm-up runs: Complete waves 1-3 repeatedly. Learn spawn locations and modifier basics. Cash out any loot.
- Push to wave 4: Get comfortable with first uniques and one or two modifiers. This is where you learn to decide continue vs exit.
- Reach wave 7: Aim for Tonalztics chance. If you can clear wave 7 consistently, you have the mechanical skill for Sol.
- Sol practice: Focus on Spear and Shield dodges. Use the combat achievements as milestones: Sportsmanship for first kill, Slow Dancing in the Sand for no running, Perfect Footwork for no damage from his basic attacks.
- Repeat for multiple quivers: Extra quivers become splinters or pet rolls. Ten Sol kills is a Grandmaster combat achievement.
Not every player has the time or patience for that climb. If you would rather skip the grind, get a service quote and see what a quiver boost costs compared to your hourly gold rate. Whatever you choose, enter the Colosseum with a plan, respect the death mechanics, and never greed a wave you cannot afford to lose.
Sources
Frequently asked questions
Is Dizana's quiver worth getting in OSRS?
Yes. It is the best-in-slot ranged cape, provides an extra ammo slot, and can be charged for additional ranged accuracy and strength. Even uncharged it beats Ava's assembler. The extra ammo slot is useful for Slayer, bossing, and raids. Duplicates have exchange value, making the unlock a long-term account asset.
What are the requirements to start the Fortis Colosseum?
You must complete the Children of the Sun quest to access Varlamore. There are no strict combat level requirements to enter, but high stats are needed for a full clear. Level 75 Ranged is required to equip the quiver, and 90+ combat stats with 77+ Prayer are strongly recommended for wave 12 attempts.
How do I avoid Sol Heredit's spear and shield attacks?
Learn the patterns. Spear 1 requires moving away from his centre or edge tiles. Spear 2 requires moving to an off-centre tile. Shield 1 has a safe gap one tile back, while Shield 2 requires stepping two tiles back. If he uses the same style twice, the second pattern changes. Practice with tile markers.
What is the death cost at Fortis Colosseum?
Deaths are dangerous. Your grave appears in the lobby, and all accumulated loot from the current run is lost. The gravestone reclamation fee is reduced by 75% up to 125,000 coins until you complete 100 total waves. After that, standard death costs apply. Hardcore Ironmen lose status.
Can you lose items in the Colosseum?
Yes. It is a dangerous death area. Unprotected items go to your grave in the lobby, but items left on the ground are lost. Any loot accumulated during the run is deleted. Teleporting or logging out during a wave also destroys loot. Always cash out between waves if you cannot risk the chest.
How many sunfire splinters does it take to charge Dizana's quiver?
The quiver can hold up to 20,000 sunfire splinter charges. While charged, arrows and bolts fired from either ammo slot gain +1 Ranged Strength and +10 Ranged accuracy. Charges are consumed on a random 1/3 roll per shot. A full charge lasts a very long time in normal use.
Is it worth paying for a Colosseum quiver boost?
It depends on your goals. If you value time over gold and do not enjoy the grind, a boost can be a reasonable shortcut. However, account sharing may violate Jagex's rules. Always verify provider reputation and consider coaching instead. Many players learn the content themselves after a few practice runs.
Marketplace
Get live rates, instant quotes, and hand-traded delivery on Trillionaire Services.
Related listings
 High-end PvM
OSRS Yama Oathplate Guide: Contracts, Death Fees & Boosting
High-end PvM guide to Yama and Oathplate: contract variants, death costs, solo vs duo learning, and the honest case for boosting over grinding.
 High-end PvM
OSRS Awakened DT2 Bosses: Which to Learn First & Why Kits Are So Expensive
A high-end PvM guide to the awakened Desert Treasure II bosses—learning order, death costs, expensive ring and axe kits, and when to buy a boost instead of sinking hours into practice.
 High-end PvM
OSRS ToA Expert Invocations: Entry Raid vs 400+ and What Buyers Should Ask For
Learn how to build a 400+ ToA expert invocation list, compare entry vs 400+ difficulty, death costs and gear, and what a boosting service buyer should ask before paying.