
 Bossing
Boosting
Moons of Peril Mid-Game Gear: What Drops Matter and How Hard It Really Is
A practical OSRS boss guide for Moons of Peril—mechanics that kill runs, gear rungs, trip length, and the drops worth chasing for mid-game accounts.
Game screenshots and facts are cited from the Old School RuneScape Wiki (strategy, equipment, drops, and related pages). Writing is original editorial, not a copy of the wiki article.
The Moons of Peril are three imprisoned nagua bosses tucked beneath Cam Torum in Varlamore. If you are around level 75 combat and still wearing budget melee gear, this is one of the most efficient pieces of content in OSRS: free supplies between kills, a real upgrade path through the Blood Moon set, and enough profit to fund other goals. This guide focuses on the mechanics that actually end trips, the gear rungs that matter, and whether a service quote is a reasonable shortcut.
Unlike Barrows, you do not need to bring prayer potions or food into the prison. Neypotzli provides fish, hunter creatures, and herbs to create everything you need. That changes the way you approach trips: you are not managing supplies, you are managing movement and curse stacks.

Is Moons of Peril Worth It for a Mid-Game Account?
The short answer: yes, especially if you want melee strength bonus without paying Bandos prices. The Blood Moon set is the headline drop. It gives a strong melee set effect and serves as a stepping stone toward Bandos armour. The Eclipse Moon set covers ranged, and the Blue Moon set covers magic. Even if you do not land a unique, the common loot includes blessed bone shards, sun-kissed bones, herbs, and atlatl darts that add up.
The wiki's money making guide estimates a typical player killing all three moons at a strong but non-degradable gear level can average around 1.3 million gp per hour at 10 kills per hour. High-end accounts with max combat and expensive weapons can push 14 kills, but the input cost is significant. You should verify current prices on the wiki because they shift with the market.
The real draw is that Moons of Peril is designed for mid-level players. The bosses roll attacks against your slash defence, not your prayer level. Protection prayers do nothing. That means a player with 70 Defence and affordable armour can survive, while a pure with 43 Prayer gets shredded. The free supplies inside also flatten the cost curve; you can do long trips without bank runs.
Requirements and Recommended Stats
Hard requirements
- Completion of Perilous Moons quest
- At least 75 combat for the intended mid-level bracket
Strongly recommended before camping
- 70+ Attack, Strength, Defence
- 70+ Ranged or Magic as a secondary style for specific moons
- 70+ Prayer for Piety
- 50+ Fishing, Cooking, Hunter, and Herblore to improve the free supplies inside Neypotzli
- 75+ Hunter to catch moonlight moths for prayer restoration
You do not need max combat. The bosses have 500 hitpoints each and share similar stats: 258 Attack, 100 Strength and Magic, and 60 Defence. Their melee attacks have +100 accuracy against your slash defence. If you show up in low-defence gear, you will eat through your free fish quickly.
Weapon speed is more important than raw max hit here because the bosses follow a three-hit cycle. A 4-tick weapon can land three attacks per cycle, while a 5-tick weapon only lands two. That single fact changes your entire gear selection, which we will cover in the gear rung table.
The Loot That Actually Matters
The Lunar Chest rewards you based on how many moons you subdued in that run. At least one Moon must be defeated to open the chest, and the chest resets each time you open it. You can also sacrifice unused armour pieces to Eyatlalli for a roughly 1 in 50 chance at another equipment roll, and you can receive the same item back.

The three armour sets are the main chase items:
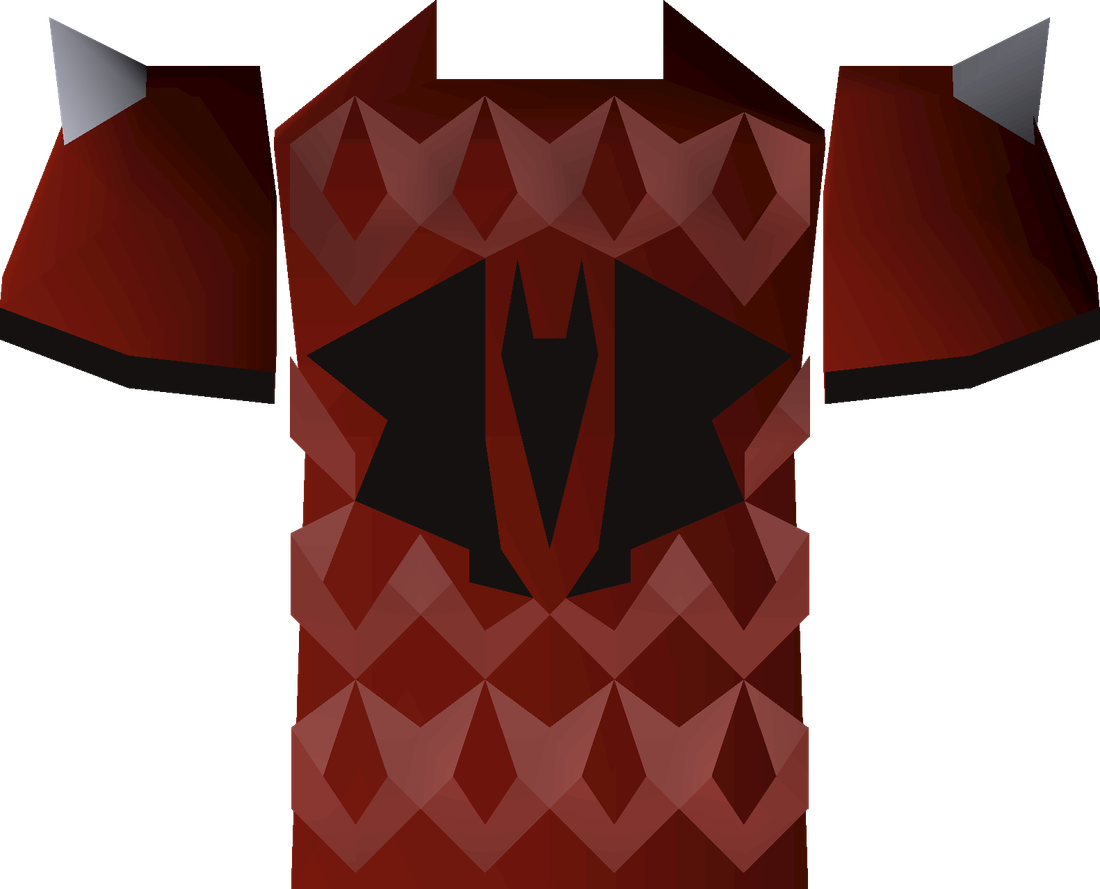
- Blood moon armour — melee set with the Bloodrager set effect. This is the most valuable drop for most accounts because it offers melee strength bonus comparable to Bandos at a fraction of the cost. It is often the final upgrade before Bandos.
- Blue moon armour — magic set with the Frostweaver set effect. Useful for bursting or mid-level mage tasks.
- Eclipse moon armour — ranged set with the Eclipse set effect. Pairs well with the atlatl, which is also dropped here.
Atlatl darts are looted regardless of which moons you subdued, so even one-moon runs can produce useful ranged ammunition. The common resource drops are especially valuable for ironmen: blessed bone shards and sun-kissed bones translate directly into Prayer experience, and the herbs and secondaries cover herblore training.
| Gear rung | Weapon style | Armour | Why it works |
|---|---|---|---|
| Budget / first trips | 4-tick melee: dragon scimitar or leaf-bladed sword | Rune or proselyte with high slash defence | Cheap, fast attack speed, enough defence to learn mechanics |
| Comfortable mid-game | Zombie axe or leaf-bladed battleaxe (5-tick switch optional) | Dragon or barrows melee, defender | Higher damage per hit, but sync with movement |
| Efficient camping | Abyssal whip or better 4-tick, with a 5-tick heavy hit switch | Bandos or blood moon armour once obtained | Maximises hits per cycle and reduces trip time |
If you are deciding what to buy before your first trip, start with a 4-tick weapon and the best slash-defence armour you can afford. Do not chase max strength until you can comfortably dodge the special attacks.
How the Fight Flow Works: Standard Attacks, Glyph, and Curse
All three Moons share a core combat loop. Each standard attack is a three-hit melee sequence. The first hit maxes 4, the second 8, and the third 20, for a total of 32. The twist is that if any hit misses, every hit after it automatically misses. That means high Defence has a compounding effect: one miss negates the rest of the stack. Protection prayers do nothing, so your only mitigation is armour and movement.
Each successful hit applies stacks of the Curse of the Moons: 1 stack on the first hit, 2 on the second, 5 on the third, up to a maximum of 127. The curse effect differs per boss, but it slowly degrades over time and disappears when you defeat that Moon. For Blood Moon, the curse translates into healing on each hit; for Eclipse, it feeds the blinding mechanic. You manage the fight by moving between the glowing glyph on the floor and the boss's position.
Eyatlalli's glyph is central. During Blood Moon specials, the game highlights one of eight moon symbols where you should stand. In general, stepping off the active glyph at the right moment can cancel the final, most damaging standard hit. This is an advanced technique: when you see the blood syphon animation on the Blood Moon's third hit, step under the boss for one tick, then click back to the glyph and continue attacking. Four-tick weapons are much easier to sync with this movement.
The bosses also damage themselves slightly each time they attack or use a special. That self-damage scales with their remaining health and slows at low HP. You do not actually need to deal the full 500 damage; the moons chip themselves during the fight. That is why kill times can feel faster than expected once you stop taking avoidable hits.

Eclipse Moon Mechanics That Kill People
The Eclipse Moon is the ranged-thematic boss, but its regular attacks still roll against your melee defence. The standard three-hit stack works exactly like the others. What kills players is the special rotation: Searing Rays and Clones.
In Searing Rays, a moon shield appears and the Eclipse Moon forcefully shoves you behind it. It then attacks with rays of light. You avoid damage by moving alongside the shield as it rotates. Getting hit deals minor damage, but it dramatically increases the blinding effect. Do not stand still and try to tank it; move with the shield.
In Clones, you are shoved to the centre of the room and the boss creates copies of itself. The Eclipse Moon has a flat armour stat of 6 normally, which reduces all damage by 6; during the Clone special, that flat armour drops to 4. That is both a threat and an opportunity: the clones can hit you if you misread the mechanic, but the main boss is slightly easier to damage during this window. Pay attention to the real Moon and the positions of the clones; the combat achievement The Clone Zone requires defeating the Eclipse Moon by only attacking clones, which is a good practice run for learning the mechanic.

Because the Eclipse Moon punishes standing still, bring a 4-tick ranged weapon if you are ranging, but melee is still viable. The key is to treat every special as a movement check, not a DPS race. If you get hit by rays early, the blinding effect will make later specials harder to read, so reset the fight if needed rather than letting the debuff stack.
Blood Moon Mechanics That Heal Her
The Blood Moon is the wall for most first-timers. Her standard attacks heal her: 1x the damage of the first hit, 2x the second, and the third heals 30 to 50 hitpoints regardless of damage dealt. If you stand in the blood pools or let her complete the third hit, the fight becomes a never-ending tank test.
You can deny the final hit and its heal. When the Blood Moon starts the third attack, look for a blood syphon animation pulling blood from your character. The moment you see it, step under the boss for one tick, then click back to the glyph and continue attacking. This takes practice, but it shaves a huge amount of time off each kill and stops her sustain.
Her specials alternate between Blood Rain and Blood Jaguar.
- Blood Rain: She disappears and rains blood from above, forming temporary pools on the floor. Standing in a pool deals up to 9 damage and heals her for 2x that damage. Move off the pools. Standing on safe tiles deals minor chip damage to her, so do not panic—just reposition.
- Blood Jaguar: Eight blood jaguars appear around the room, and the Blood Moon sacrifices up to 15 of her own hitpoints to create them. Eyatlalli highlights one of the eight moon symbols; stand there to avoid the curse. The jaguars use cleave attacks on the two tiles in front of them, up to 9 damage, while blood pools deal up to 6. Attacking a jaguar restores your health, up to 25 per special. Time your movement so you avoid both the jaguar cleave and the pools. A 4-tick weapon keeps you in sync; 5-tick users will need to be more cautious.

If you find yourself chugging supplies, the problem is almost always movement, not gear. Focus on stepping under the third hit and never standing in a pool. Once you nail those two habits, Blood Moon becomes a steady, profitable kill.
Trip Length, Routes, and KC Goals
You do not need to kill all three moons every run. The antechamber branches into three separate rooms, and you can camp a single Moon if you only need its set. The strategy page lists farming routes for General (all three), Blood Moon only, Blue Moon only, and Eclipse Moon only. The general route is best for profit and collection log progress, but single-moon runs are more relaxed for learning one boss.
Because Neypotzli provides fishing spots, hunter creatures, and herbs, trips can last indefinitely. You are limited by your patience and attention, not supplies. The combat achievement Fat of the Land requires defeating 30 Moons without leaving the dungeon, which is entirely possible with 75+ Hunter for moonlight moths and 50+ Cooking for cooked moss lizards.
KC goals to aim for:
- 5 chest opens — Perilous Novice combat achievement, medium tier (2 points)
- 25 chest opens — Perilous Champion, hard tier (3 points)
- One full run under 8 minutes — Speed-Trialist, medium tier
- One full run under 6 minutes — Speed-Chaser, hard tier
- 30 moons without leaving — Fat of the Land, hard tier, tests endurance
For money making, the wiki assumes 10 kills per hour (one full rotation roughly every 18 minutes including resupply). At max combat with a Scythe of Vitur and high-end gear, 14 kills per hour is possible, but that is not a mid-game setup. Treat 8–10 kills per hour as a realistic target for 70–80 combat stats.
Common Mistakes That End Trips
Do not make these errors on your first trips:
- Praying Protect from Melee — useless; all Moon attacks ignore protection prayers.
- Bringing a 5-tick weapon and trying to face-tank the third hit — you will heal the Blood Moon and extend the fight.
- Ignoring the curse stacks — the debuff maxes at 127 and will kill you through chip damage if you refuse to move.
- Standing in blood pools during Blood Rain or Blood Jaguar — every tick of damage heals the boss, turning a 90-second kill into a 3-minute slog.
- Not using the free supplies inside — bank food and potions are worse than what you can make at level 50 Fishing/Cooking/Hunter/Herblore.
- Attempting single-moon runs without lowering your expectations — you only get one loot roll per chest open, so profit per hour drops.
The biggest hidden mistake is tunnel visioning on DPS. The Moons are a movement fight disguised as a DPS check. If you are constantly eating, you are standing in the wrong place, not under-geared.
When a Quote or Carry Makes Sense
Moons of Peril is genuinely soloable for a mid-level main, but there are honest reasons to pay for a service or carry. If you are combat 60 and just finished Perilous Moons, the bosses will out-damage your food before you learn the movement. A carry can get you the Blood Moon set early, which then makes everything else faster. Similarly, if you cannot commit to learning the step-under timing for Blood Moon, a service can farm the uniques while you skip the frustrating part.
That does not mean you should buy a carry before trying. The free supplies and clear telegraphs mean most players with 70 Defence and a 4-tick weapon can learn this in a few trips. Use a service when time is worth more than gold, or when you want a specific piece without burning a weekend on RNG. If you decide that is you, get a service quote and see what a carry costs before you commit.
Do not expect a carry to teach you mechanics—it will not. Treat it as a shortcut to gear, then go back and learn the fight when you have the stats to enjoy it.
Next Steps After Your First Moons Runs
Once you have a few chest opens, your next upgrades depend on what you pulled. If you landed Blood Moon armour, you have a strong melee set that works at many bosses. If you got the Eclipse set, the atlatl becomes a decent ranged option for mid-game PvM. Either way, the common drops will have funded your supplies and prayer experience.
For players moving on from Moons, the logical progression is Bandos for melee, or another mid-game boss that drops relevant upgrades. Our Zulrah rotation guide covers a similar difficulty spike with different gear requirements. If you are still building stats, finish the 50+ skilling levels so you can make all the free supplies, then return for longer trips and combat achievement chases.
Start with one full rotation today. Kill all three moons, open the chest, and write down your kill time. Improving that time from 10 minutes to 6 minutes is the real progression—and the drops will come.
Sources
Frequently asked questions
What are the requirements for Moons of Peril?
You must complete the Perilous Moons quest and have at least 75 combat. Recommended stats are 70+ Attack, Strength, and Defence, plus 50+ Fishing, Cooking, Hunter, and Herblore to make the best free supplies inside Neypotzli. Protection prayers do not work, so defence gear matters.
Is Blood Moon armour better than Bandos?
Blood Moon armour is not strictly better, but it is a much cheaper stepping stone. It offers melee strength bonus and a set effect, making it competitive with Bandos for mid-game accounts. Many players use Blood Moon until they can afford Bandos pieces.
How do you avoid Blood Moon special attacks?
For Blood Rain, move off the red pools on the floor. For Blood Jaguar, stand on the glowing moon symbol that Eyatlalli highlights, and move to avoid jaguar cleaves and pools. Attacking a jaguar restores health, so time your movements with a 4-tick weapon.
Can you solo Moons of Peril at 75 combat?
Yes, with 70 Defence and a 4-tick melee weapon like a dragon scimitar you can solo all three moons. The free supplies inside Neypotzli help sustain trips. Expect to learn movement mechanics over a few attempts; Blood Moon is the usual wall.
What is the best weapon for Moons of Peril?
A 4-tick melee weapon is best for most players because the bosses' three-hit cycle allows three attacks per cycle. Dragon scimitar, leaf-bladed sword, or abyssal whip are good. You can add a 5-tick heavy weapon as a switch for extra damage during movement.
How do you get to Moons of Peril?
The entrance to Neypotzli is at the northern end of Cam Torum. You can teleport with a calcified moth, use the Quetzal Transport System to Cam Torum, or walk. Once inside, the antechamber branches to the three boss rooms.
What loot does Moons of Peril drop?
The Lunar Chest drops Blood Moon (melee), Blue Moon (magic), and Eclipse Moon (ranged) armour sets, plus atlatl darts. Common loot includes blessed bone shards, sun-kissed bones, herbs, and other supplies. You can sacrifice armour to Eyatlalli for a ~1/50 chance at another equipment roll.
Marketplace
Get live rates, instant quotes, and hand-traded delivery on Trillionaire Services.
Related listings
 Bossing
OSRS Kalphite Queen Boss Guide 2026: Diary, Head, Farm
A deep dive into the Kalphite Queen in 2026: two-form mechanics, gear rungs, Desert Diary head drops, and whether KQ remains a realistic solo farm.
 Bossing
OSRS Yama Contracts for Oathplate: Bossing Guide
Yama contracts for oathplate armour are a long, layered grind. This guide breaks down requirements, mechanics that kill players, gear rungs, drop math, KC goals, and when a carry is reasonable.
 Bossing
OSRS Royal Titans Duo Guide: Boss Roles, Loot, Carry (2025)
Royal Titans is Old School RuneScape's best entry point into duo PvM. Learn phase-by-phase mechanics, gear rungs, contribution scaling, unique drops, common mistakes, and when a carry makes sense.